
What you will need
- The Sims 2 Storybook Editor - I am assuming you know how to use this. The manual is a good place to start if you don't 😉
- A text editor, like Notepad, etc. I recommend HTML-KIT
- My zip of goodies
- A little knowledge of XHTML/CSS helps, but isn't necessary
- Your completed story, obviously
Saving your XML file as a dynamic HTML storybook
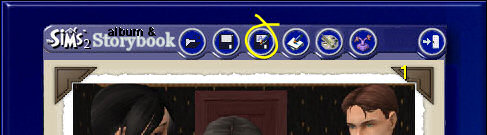
Once you are happy with your final story, you can save it as a dynamic HTML file. Select the button below:
Choose a convenient location for your story files. It's best to create a separate folder for each story. Give your file a name and save with the following option:

It will ask you do you want to copy the images as well. Hit yes.
Now we're going to edit the code. The layout of the page is currently like this, which I don't think is very pretty.

If you're happy with the layout as it is, that's fine. But I'm guessing you're not, which is why you're reading this tutorial. Open up your HTML file, and let's start tampering with the
code!
I could just walk you through all the individual changes, but that would take too long. So let's just copy and paste - much quicker! The first thing we are going to change:

Delete EVERYTHING from the top of the page up to line 156 as shown above. Now replace it with the text in change1.txt from the goodies zip (you did download it didn't you?!). On line 6, between the title tags, add your story title. This is what will show up in the title bar of the window.
What has this change done? It's replaced the legacy HTML with the more modern and correct XHTML, added a stylesheet link (more of this later), stopped the file using your story text as the image's alt text and stopped search engines from creating cache copies of your files.
NOTE: If your screenshots are NOT 600x450, you will need to edit the numbers on line 110 to whatever dimension your images are. Next up, we will change the actual layout of your page.
You need to delete everything from the <body> tag and below. That's this:

You can't see the text too well here. In any case, search for the opening body tag (it will be about 26 lines from the bottom) then delete this line and everything below it. So the last thing in your document should be
</script></head>
If you want the title and navigation buttons to be above the picture, as I have done for my stories, paste at the end of the file the text from change2-top.txt. If you'd prefer the title and navigation buttons to be below the image, paste in the text from change2-bottom.txt. Two lines you need to change. YOUR TITLE HERE with your story title, and YOUR NAME HERE with your name. You might also want to paste in EA's disclaimer if it won't be elsewhere on the page. Please don't remove the credit to me from the page! Since you're copying and pasting my code it's only fair I get a name-check, no?
One more change we need to do is a find and replace. If you're using HTML-KIT, hit Ctrl-H and enter <BR> into the find field, and <br /> into the replace field and hit Replace All. If you're using a different text editor you'll have to work it out yourself, usually Edit > Replace, or something like that.
Save your file and have a look at the results. The layout is now okay, but could be prettier. That's where our style sheet comes in!
Editing the stylesheet
This is called story.css. If you're going to edit the name of this file, be sure to also change the text on line 9 of your HTML file or it will not work. Copy this file into the same folder as your HTML file. Let's open up the stylesheet now. Don't just double-click the file unless your PC is configured to handle CSS files. You need to tell it to do this, otherwise open the file with your text editor.
The colour scheme here is the one I've used on my stories. Have a look through to see if you like it. You might want to change the colours to fit in with your own site scheme. Here are the bits you'd most likely want to change. It's the bit after the colon [ : ] that you need to modify. For a list of colours visit W3Schools.
- Line 5: the page background colour. Default: #222222 (a dull grey)
- Line 12: the colour of your links. Default: #eeeeee (off-white)
- Line 25: the border around caption box. Default: 2px solid black (speaks for itself)
- Line 26: the background colour of the photo and caption box. Default: #556777 (dull blue)
- Line 35: the border around the photo. Default: 2px solid black. Replace this with 'none' if you don't want the photo to have a border
- Line 51: this is the size of the copyright stuff at the bottom of the page.
That's it! Your story file is now ready!
Uploading your story
There are a few things you need to know before uploading. Firstly if you are using blog software like wordpress, livejournal, blogger, etc, most likely you will not be able to post your dynamic story there. Why? Because they tend to disallow JavaScript. You will need to host your files elsewhere, like tripod.com or one of those. If you have your own web server, then you can upload as is.
Hosting your pics - you will need to edit the code to link to your photos correctly. This is pretty simple; a bit of Find and Replace will sort it out for you. Find snapshot_ (don't forget the underscore or you will screw up the code!) and replace with [your url]snapshot_ e.g. in my case replace snapshot_ with
http://i228.photobucket.com/albums/ee162/silverssimstuff/JasmineOne/snapshot_
And you can also see I've created a separate folder for each story's photos. It makes it easier if you want to delete and change pics. Remember that, especially if you use a lot of photos, stories can take up a lot of space, up to 5MB or more for a typical 60 page story! Lastly, don't forget the stylesheet! You can use the same stylesheet file for all your stories, you don't need a separate copy for each one, just make sure the HTML file correctly points to the stylesheet file.
That's all! You're ready to upload your HTML file, stylesheet and photos (you don't need to upload the thumbnails, they aren't used by the HTML file).