As I said in a previous post, you CAN use LIT on fabric. Previously, I used LIT mixed in with Tulip Fashion Glitter Bond, which I piled over dried fabric paint. While it worked, it didn't look very attractive, appearing very lumpy and just amateurish in general. This time, I tried LIT mixed in with the Tulip Glow fabric paints, and the result looks super good! It has a very painterly look, quite like watercolour at times.
I used LIT in the four available colours: original green, blue, pink and yellow; plus Tulip Glow fabric paint in pink, blue and yellow. Plus various Tulip Slick paints in neon.
So for my first experiment, I mixed up some Pink LIT with pink glow paint, and this time I used a regular paintbrush. So far, so good! The fabric did absorb quite a lot of paint (do make sure to place at least 1 layer of card inside the t-shirt. It's touch-dry within about 10 minutes, I think. I didn't time it, but it really wasn't long.

So with that seeming to work, it's time to finish! Rainbows are the easiest way to use all the colours, and Tiny loves them, so I definitely wanted one. The rest of the design I just winged. I quite like it. It's simple, but colourful and fun, and Tiny likes it. I used straight metallic white from the bottle to make the cloud, which I admit does look a bit strange, but hey, it's for a 4 year old.

Since the blue and original LITs don't have any background pigment like the pink and yellow LITs, I used a dab of neon blue and green fabric paint to tint them.

The yellow glow does look very similar to the green glow. There is a slight difference, but it is very slight.
The Slick fabric paints, when used alone and applied thickly direct from the bottle, have a very, well, slick feel. They feel -- and look -- glossy and smooth, but when mixed in with LIT and brushed on, the texture becomes very different; quite rough and stiff. It's similar to the Tulip Soft paints, but with a definite rough texture. However, when I mixed the LIT in with just Glitter Bond, it did have a smooth feel to it. Strange.
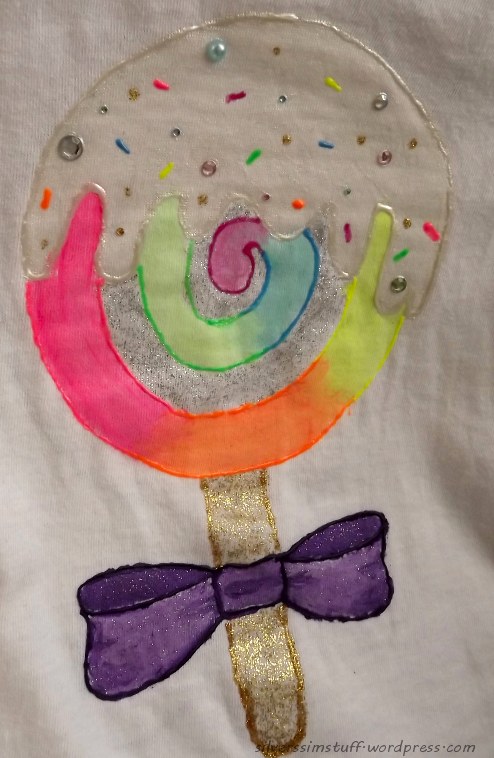
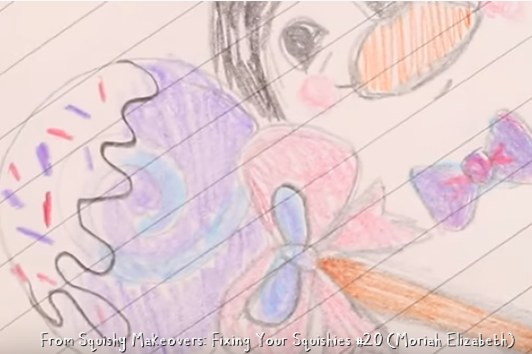
So with t-shirt no.1 complete, it's time to make another! I decided on a lollipop for this one, inspired by an abandoned design by Moriah Elizabeth, and why not add rainbow in this design, too, as a tribute?
...becomes...
It may have helped to actually reference the picture, rather than relying on memory.
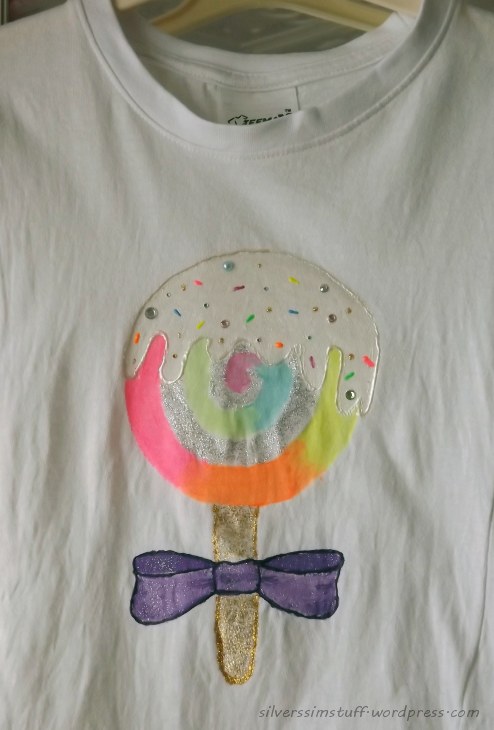
I'm less happy with this one overall. I think the colours just didn't come out as vibrant; maybe I was skimping on the LIT (that stuff is expensive), and the lolly itself feels kinda muted compared to the rainbow one. I dunno. I think maybe a border with the Slick Neon paints might help. Also, the size of the stick is ridiculous.
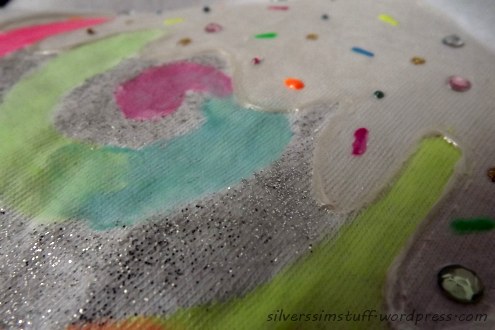
What I did really like was the bow. Even though it's pretty badly drawn, I love how watercoloury it came out. It doesn't show so well in the photos, but it has a very nice painterly look to it.

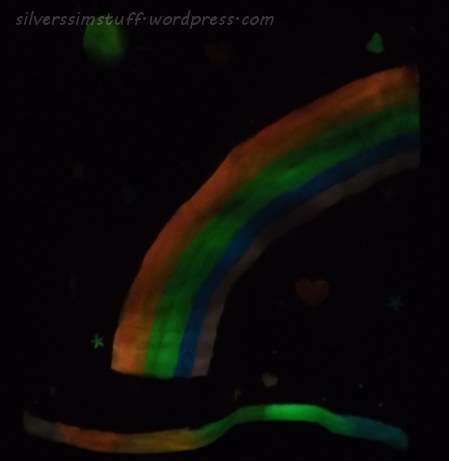
Now I did add a bit of LIT to the stick and the bow, but it wasn't enough, as it's barely perceptible in the dark. This time I did mix a bit of Glitter Bond into the Tulip/LIT mix, but it didn't really have an effect; it still has the rough, stiff texture to it.
Another fun craft project that didn't take too long. About a couple of hours per t-shirt. Now I haven't done the laundry test yet, as the paints need at least 3 days to fully settle before they can be washed. But if the success of the Glitter Bond experiment is anything to go by, I think it should be fine. Otherwise that's a lot of expensive glow pigment literally down the drain :O It washes safely at up to 40°. I haven't tried it any higher than that.
Update: It does look better with the bordering. It's still a weird design though! Sorry for the distortion. The perspective is all messed up.